ERP Systems are, by nature, complex business applications that offer multiple functionalities to the user. However, this complexity comes at a price: the user interface can become increasingly “crowded” and “cluttered,” posing a risk of the user getting lost in numerous menus, options, and data entry fields. To avoid this situation, the user has the option to configure the user interface, and in the Dynamics 365 Business Central ERP system this is done through the “Personalization” functionality.
Let’s take a concrete example: you’re on the Sales Order page, and there are certain fields displayed on this page that you don’t want to see because it will never be used. To personalize the page, click on the gear icon in the upper right corner and then choose the “Personalize” option:
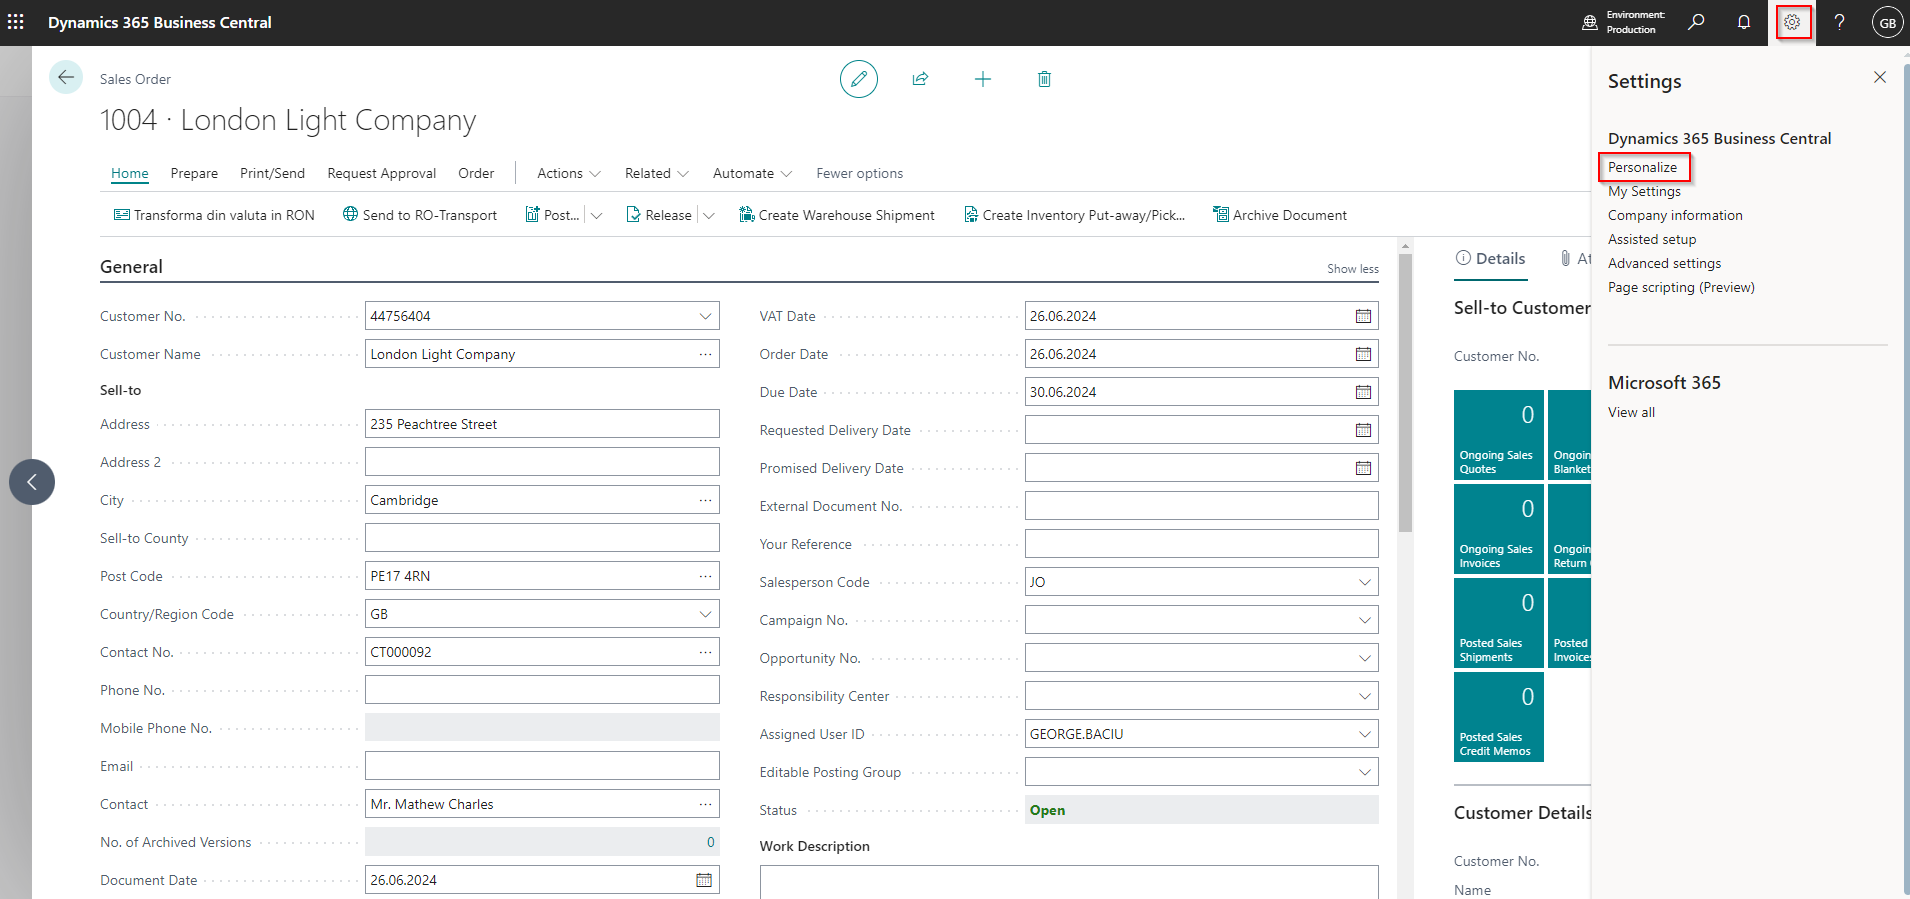
Once you clicked on this option, “Personalization” mode is activated and it is possible to add or remove fields. Suppose we don’t use the sales campaigns functionality in Business Central, and therefore, we are not interested in having the “Campaign No.” field visible. To hide it, position yourself on the “Campaign No.” field, click on the red arrow, and then select the “Hide” option:

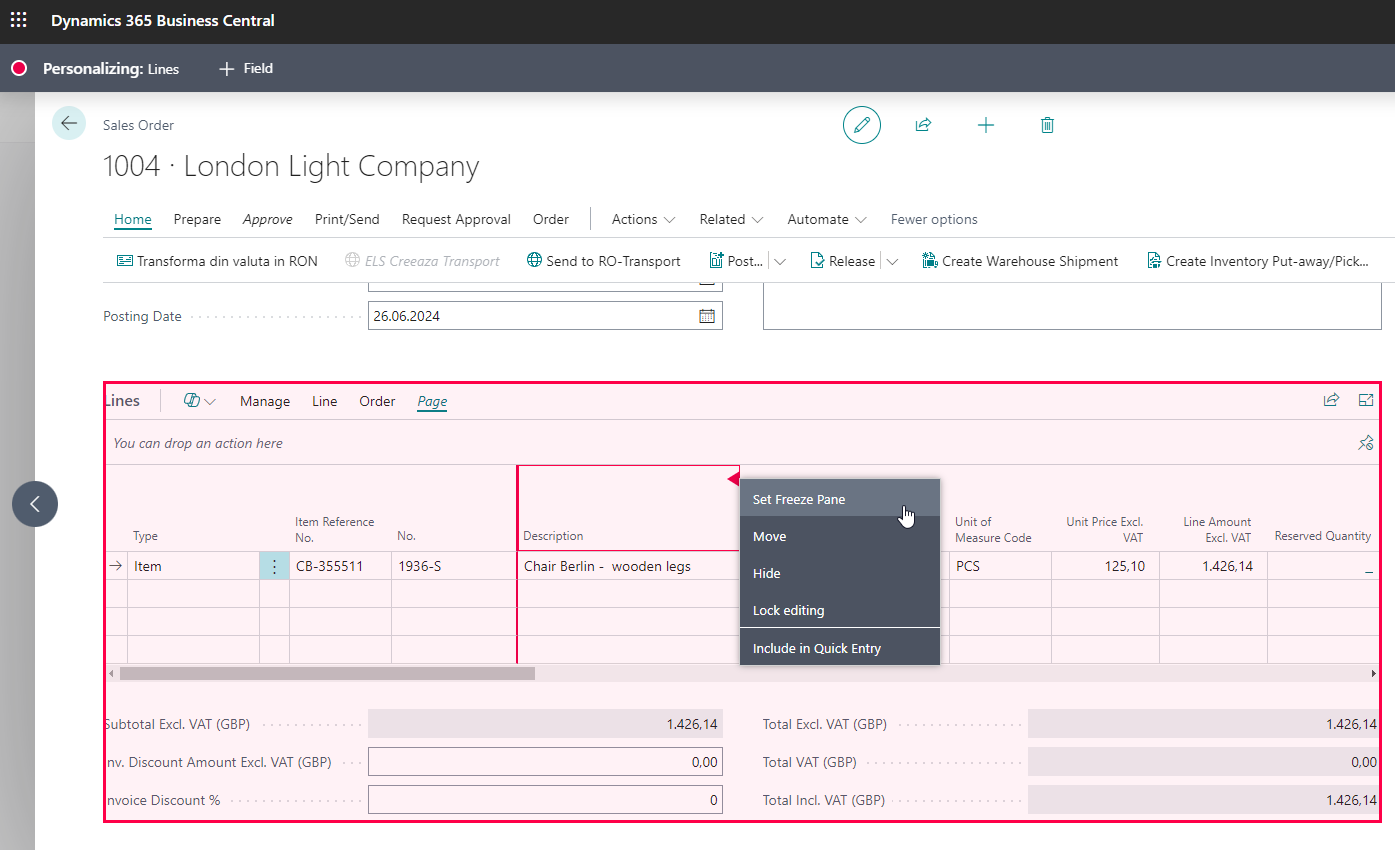
The sales order is a document composed of a header and lines. The field we hid is part of the order header, but if we want to personalize the lines, we scroll down and select the fields from the sales lines box. In the sales lines, we have the option that when we use the horizontal scroll bar to view fields from left to right (there are many fields, and they don’t all fit on the screen), certain fields remain permanently on the left side. This can be achieved with the “Freeze Pane” option.
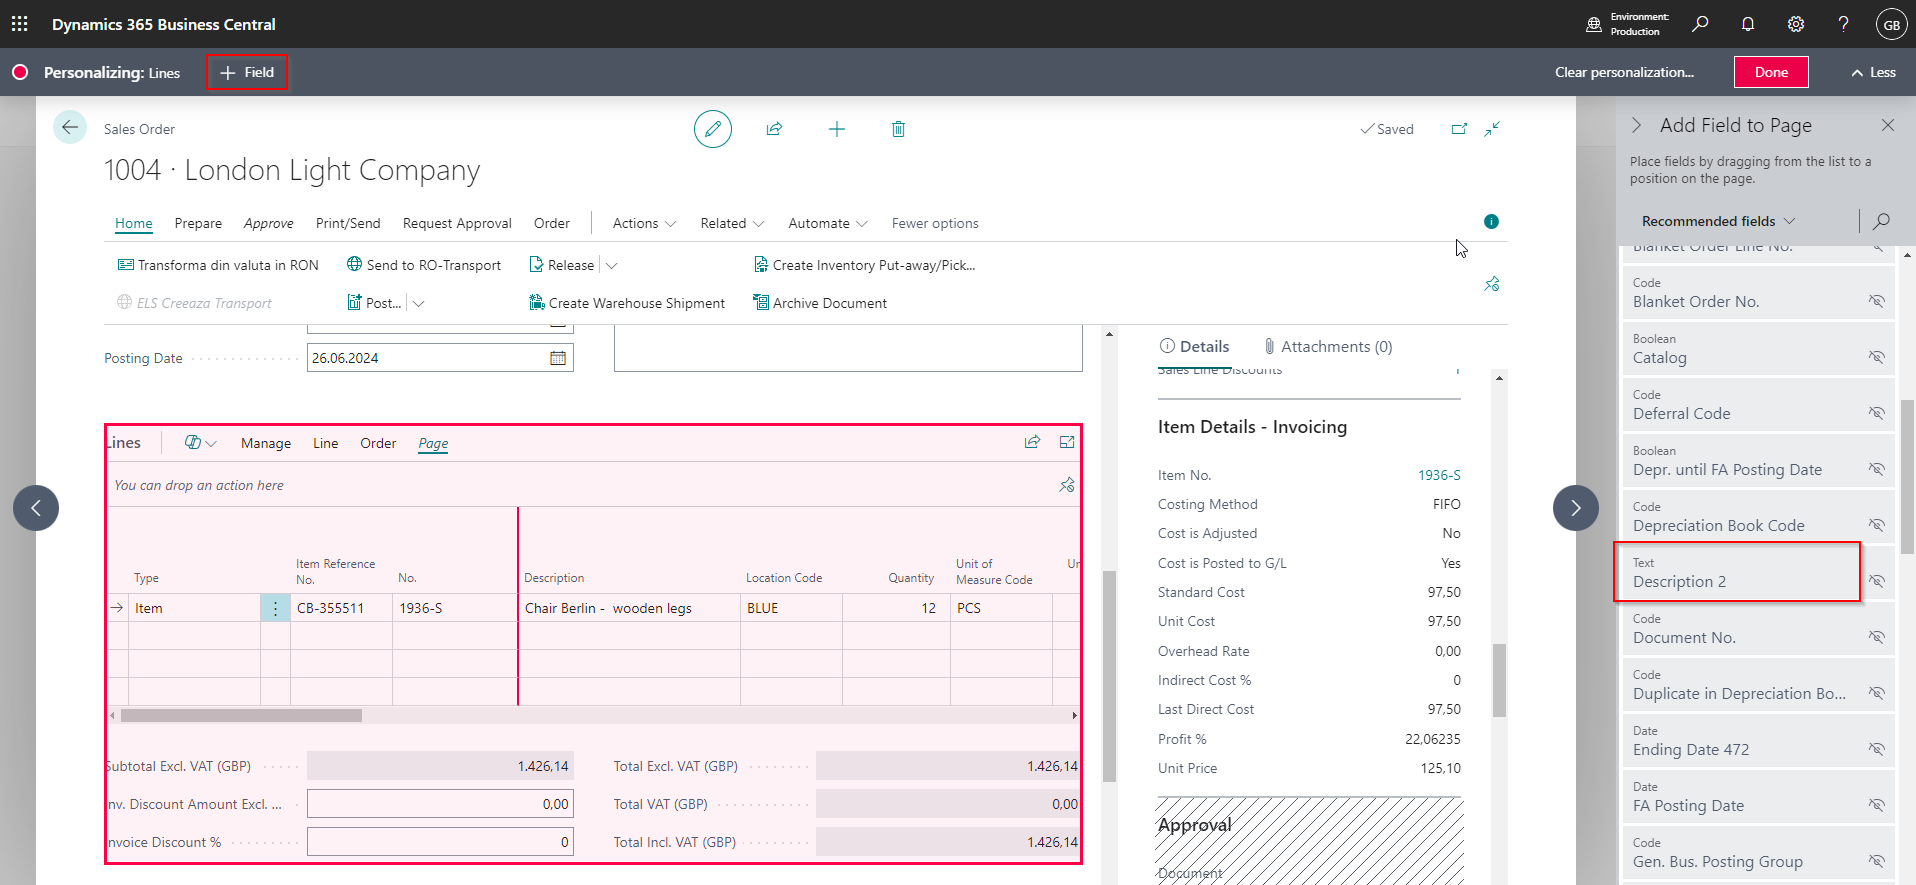
You can change the order of fields by positioning yourself on a field and dragging it with the mouse to the desired location. If you want to add a field, you will need to select the “+ Field” option from the black bar at the top. When you select it, a list of available fields will open on the right side of the page, and from this list, you can drag the desired field to the position on the page where you want to place it.
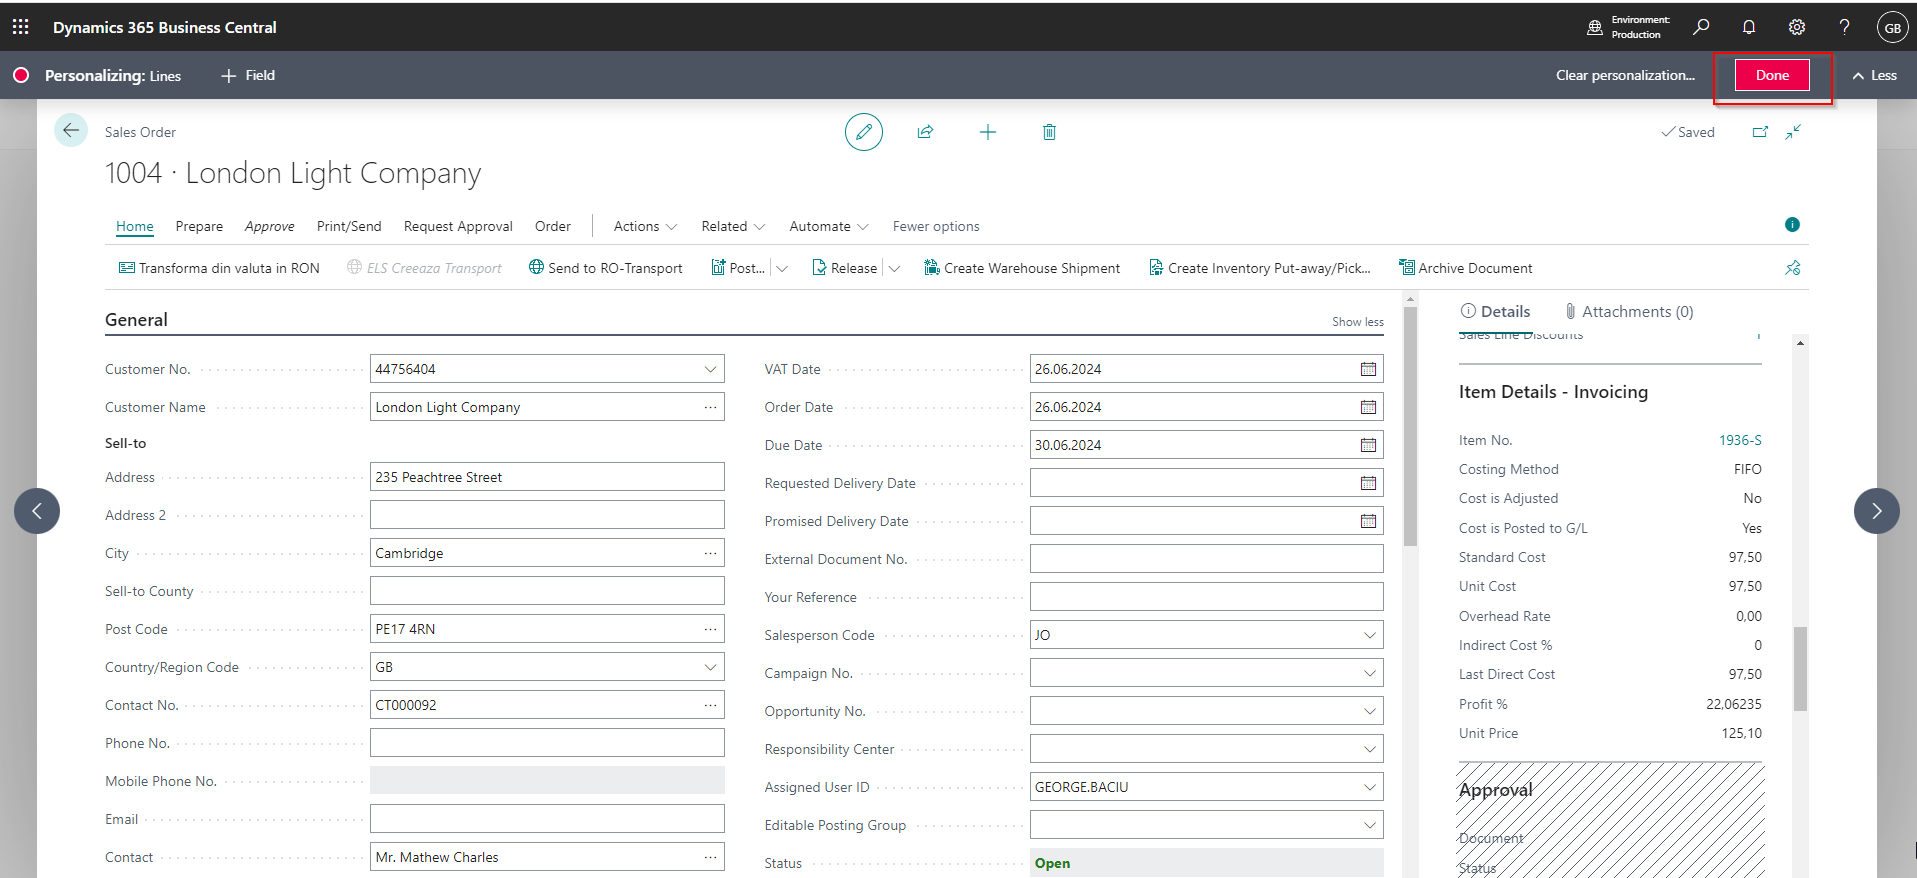
Finally, after making all the desired changes, click the “Done” button, and the changes made to the page will be saved. It’s important to note that these changes are only made for the user who performed the personalization; the pages of other users are not affected in any way.
There are other actions and options available in the page personalization process, but these will be covered in future articles.
Elian Solutions is part of the Bittnet Group, active for over 15 years as an implementer of the Microsoft Dynamics 365 Business Central ERP system. With a team of over 70 employees and a portfolio of over 250 clients, Elian Solutions is one of the key Microsoft partners for ERP systems.